banner
Home - Products - Journal Notebook - Spiral Notebooks
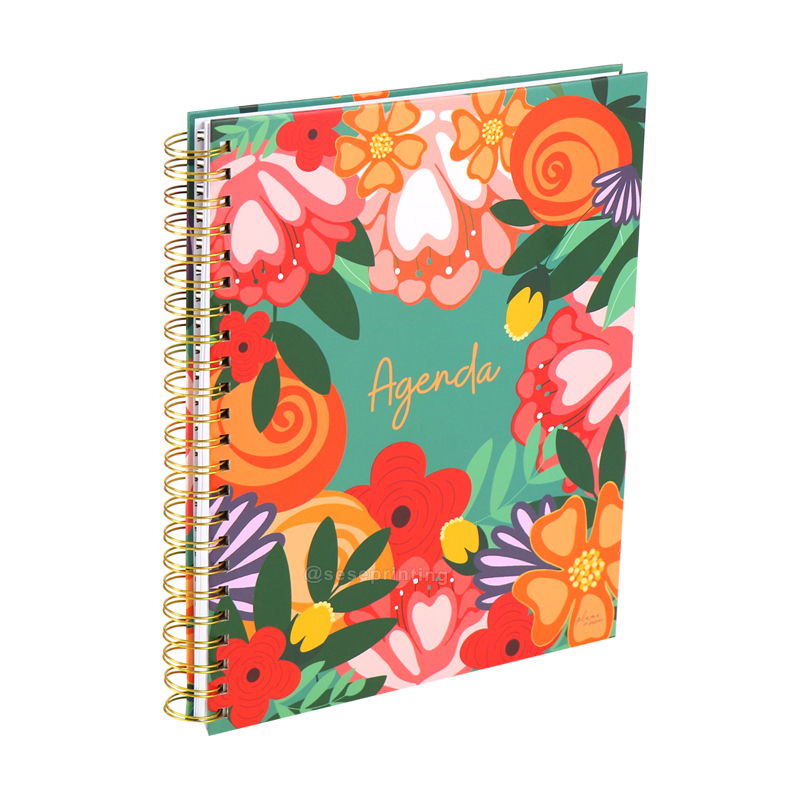
Create Dateless Diary Notebook Printing Budget Planner Agenda

Create Dateless Diary Notebook Printing Budget Planner Agenda

Name: Agenda Planner
Material: Coated Paper
Finishing: Matte Lamination Cover
Color: CMYK
Size: A5
MOQ: 500 pcs
OEM service: Yes
Package: Bubble Bag + Strong Carton
Produt Details

Create Dateless Diary Notebook Printing Budget Planner Agenda

Product details

Product Name  Budget Planner
Material Art Paper, Kraft Paper,Coated Paper, White or Grey Paper, Silver or Gold Card Paper, Special Paper Etc.
Binding Wire-O Binding, Spiral Binding, Hardcover Binding, Perfect Binding, Disc Bound Binding, Binder Binding and Others.
Certification ISO9001, SA8000, FSC
Design From Clients,OEM
Size A4, A5 or Custom
Printing CMYK or Pantone
Artwork Format AI, PDF, ID, PS, CDR
Finishing Gloss or Matt Lamination, Gold Foil Stamping, Emboss, Deboss and More

Creating a custom planner agenda involves designing a layout that suits your specific needs and preferences. Here's a guide to help you create your custom planner agenda:

Step 1: Identify Your Requirements
Define Purpose:
Determine the primary purpose of your planner (e.g., daily tasks, appointments, goal tracking, etc.).

Choose Layout:
Decide on a layout that suits your needs (daily, weekly, monthly, or a combination).

Additional Features:
Identify any additional features you want, such as space for notes, habit trackers, goal-setting sections, or inspirational quotes.

Step 2: Designing the Layout
Digital or Paper:
Decide whether you want a digital planner (to be used on devices like tablets) or a physical paper planner.

Design Software:
Use graphic design software to create your planner layout.

Sections and Categories:
Organize your planner into sections (e.g., weekly spreads, monthly overviews, notes). Allocate space for each section based on your priorities.

Customization:
Personalize the design with colors, fonts, and any graphics that resonate with your style.

Functional Elements:
Integrate functional elements, such as checkboxes for to-do lists, space for appointments, or sections for prioritizing tasks.

Goal Tracking:
If goal tracking is important, include dedicated pages or sections for setting and reviewing goals.

Habit Trackers:
Add habit trackers if you want to monitor and improve daily habits.

Step 3: File Preparation
Format and Resolution:
Ensure your design files are in the correct format and resolution for printing or digital use.

Export Options:
Export your files in the appropriate format for your chosen method (PDF for printing, JPEG or PNG for digital use).

Step 4: Printing (If Physical Planner)
Printing Method:
Decide on a printing method based on your budget and preferences (e.g., digital printing for small quantities, offset printing for larger batches).

Paper Selection:
Choose a paper type that suits your needs. Consider factors like thickness, texture, and whether you want writable paper.

Cover Options:
Design a cover for your planner. Decide if you want a softcover or hardcover and choose a material accordingly.

Step 5: Binding (If Physical Planner)
Binding Type:
Choose a binding method. Options include spiral binding, perfect binding, or stitched binding.

Page Order:
Ensure that your pages are in the correct order before binding.

Step 6: Testing
Print a Prototype:
Print a prototype or sample to check for any design or layout issues.

Step 7: Finalizing
Review and Adjust:
Review your prototype and make any necessary adjustments.

Final Production:
If you're satisfied with the prototype, proceed with the final production of your custom planner agenda.

Step 8: Digital Planner (If Applicable)
Digital Platform:
If you're creating a digital planner, consider the platform you'll use (e.g., Notion, GoodNotes, OneNote).

Export and Upload:
Export your digital planner pages in the appropriate format and upload them to your chosen platform.

Testing:
Test the digital planner to ensure all interactive elements (if any) work as intended.

Step 9: Distribution
Personal Use or Sale:
Decide whether you'll use the planner for personal use or if you intend to sell it.

Distribution Method:
Determine how you'll distribute the planner (e.g., online platforms, local stores, personal network).

Promotion:
If selling, develop a marketing strategy. Use social media, websites, or other promotional channels to reach your target audience.

Leave a Message
loading
Technical Support: Magic Lamp
Whatsapp
Send an Email